Let’s continue our discussion about the frying pan shape. Things become even more fun when you realize the same shape exists all over the fretboard.
This is part 3 of my series about learning the Am pentatonic scale:
- Part 1. What’s wrong with Am Pentatonic?
- Part 2. The Frying Pan
By now you should be pretty comfortable making somewhat coherent lines over an Am, but no matter how good you get, you’ll eventually want to expand beyond just those particular five notes and start continuing lines higher up or lower down the neck (using notes in different octaves).
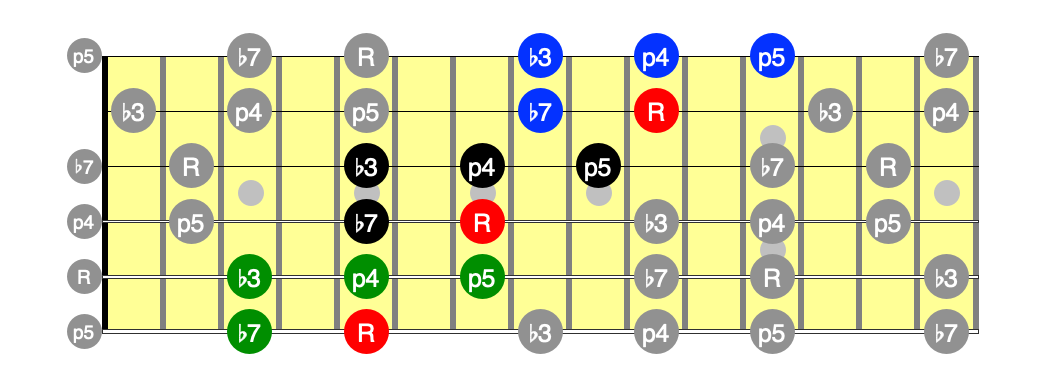
The great thing about that frying pan shape is that it exists in several different locations on the neck. Here are the two locations adjacent to the one we’ve been looking at (the lower one marked in green, and the higher in blue):
You can take the same licks you’ve come up with already and simply shift them to these new locations to create some terrific ascending and descending lines.
Even better, these shapes are connected. Instead of just treating them as three disjoint locations to play the same licks in different octaves, you can also create lines that fluidly move between them. Best of all, it takes very little mental effort to remember the function of each note (the root, for example, is always at the heel of the pan).
Let’s look at the green pan with the root on the fifth fret of the 6th string first. Notice how the p5 of that shape (the end of the handle) is immediately adjacent to the root of the shape we’ve been studying. The handle of one shape is just one string lower than the heel of the first shape. If you happened to have a seven or eight string guitar, the next lower frying pan shape would line up below the green one in exactly the same way.
The same thing almost holds true for the blue shape relative to the original shape. The heel of the blue pan isn’t on the same fret as the handle of the original one, but shifted up one fret. This is because of a tuning anomaly on the guitar. If the guitar were tuned strictly in fourths across all the strings (that is, EADGCF instead of EADGBE) then the handle would line up with the heel exactly. Because the interval between the open 3rd string (G) and open 2nd string (B) is only a third (G-1, A-2, B-3) the blue shape in the higher octave has to be shifted up one fret.
As we’ll see, this anomaly in tuning between the 2nd and 3rd strings is both a blessing (because it makes a lot of chords easier to play) and a curse (because you have to remember to shift patterns up or down a fret as you cross that 2nd/3rd string boundary). For now, just remember that the “blue” pan up higher on the neck is one fret higher.
Try it!
Practice moving up and down all three shapes, always starting and ending on a root note (this helps your ear to hear associate the sound of the root against the other notes in the scale.)
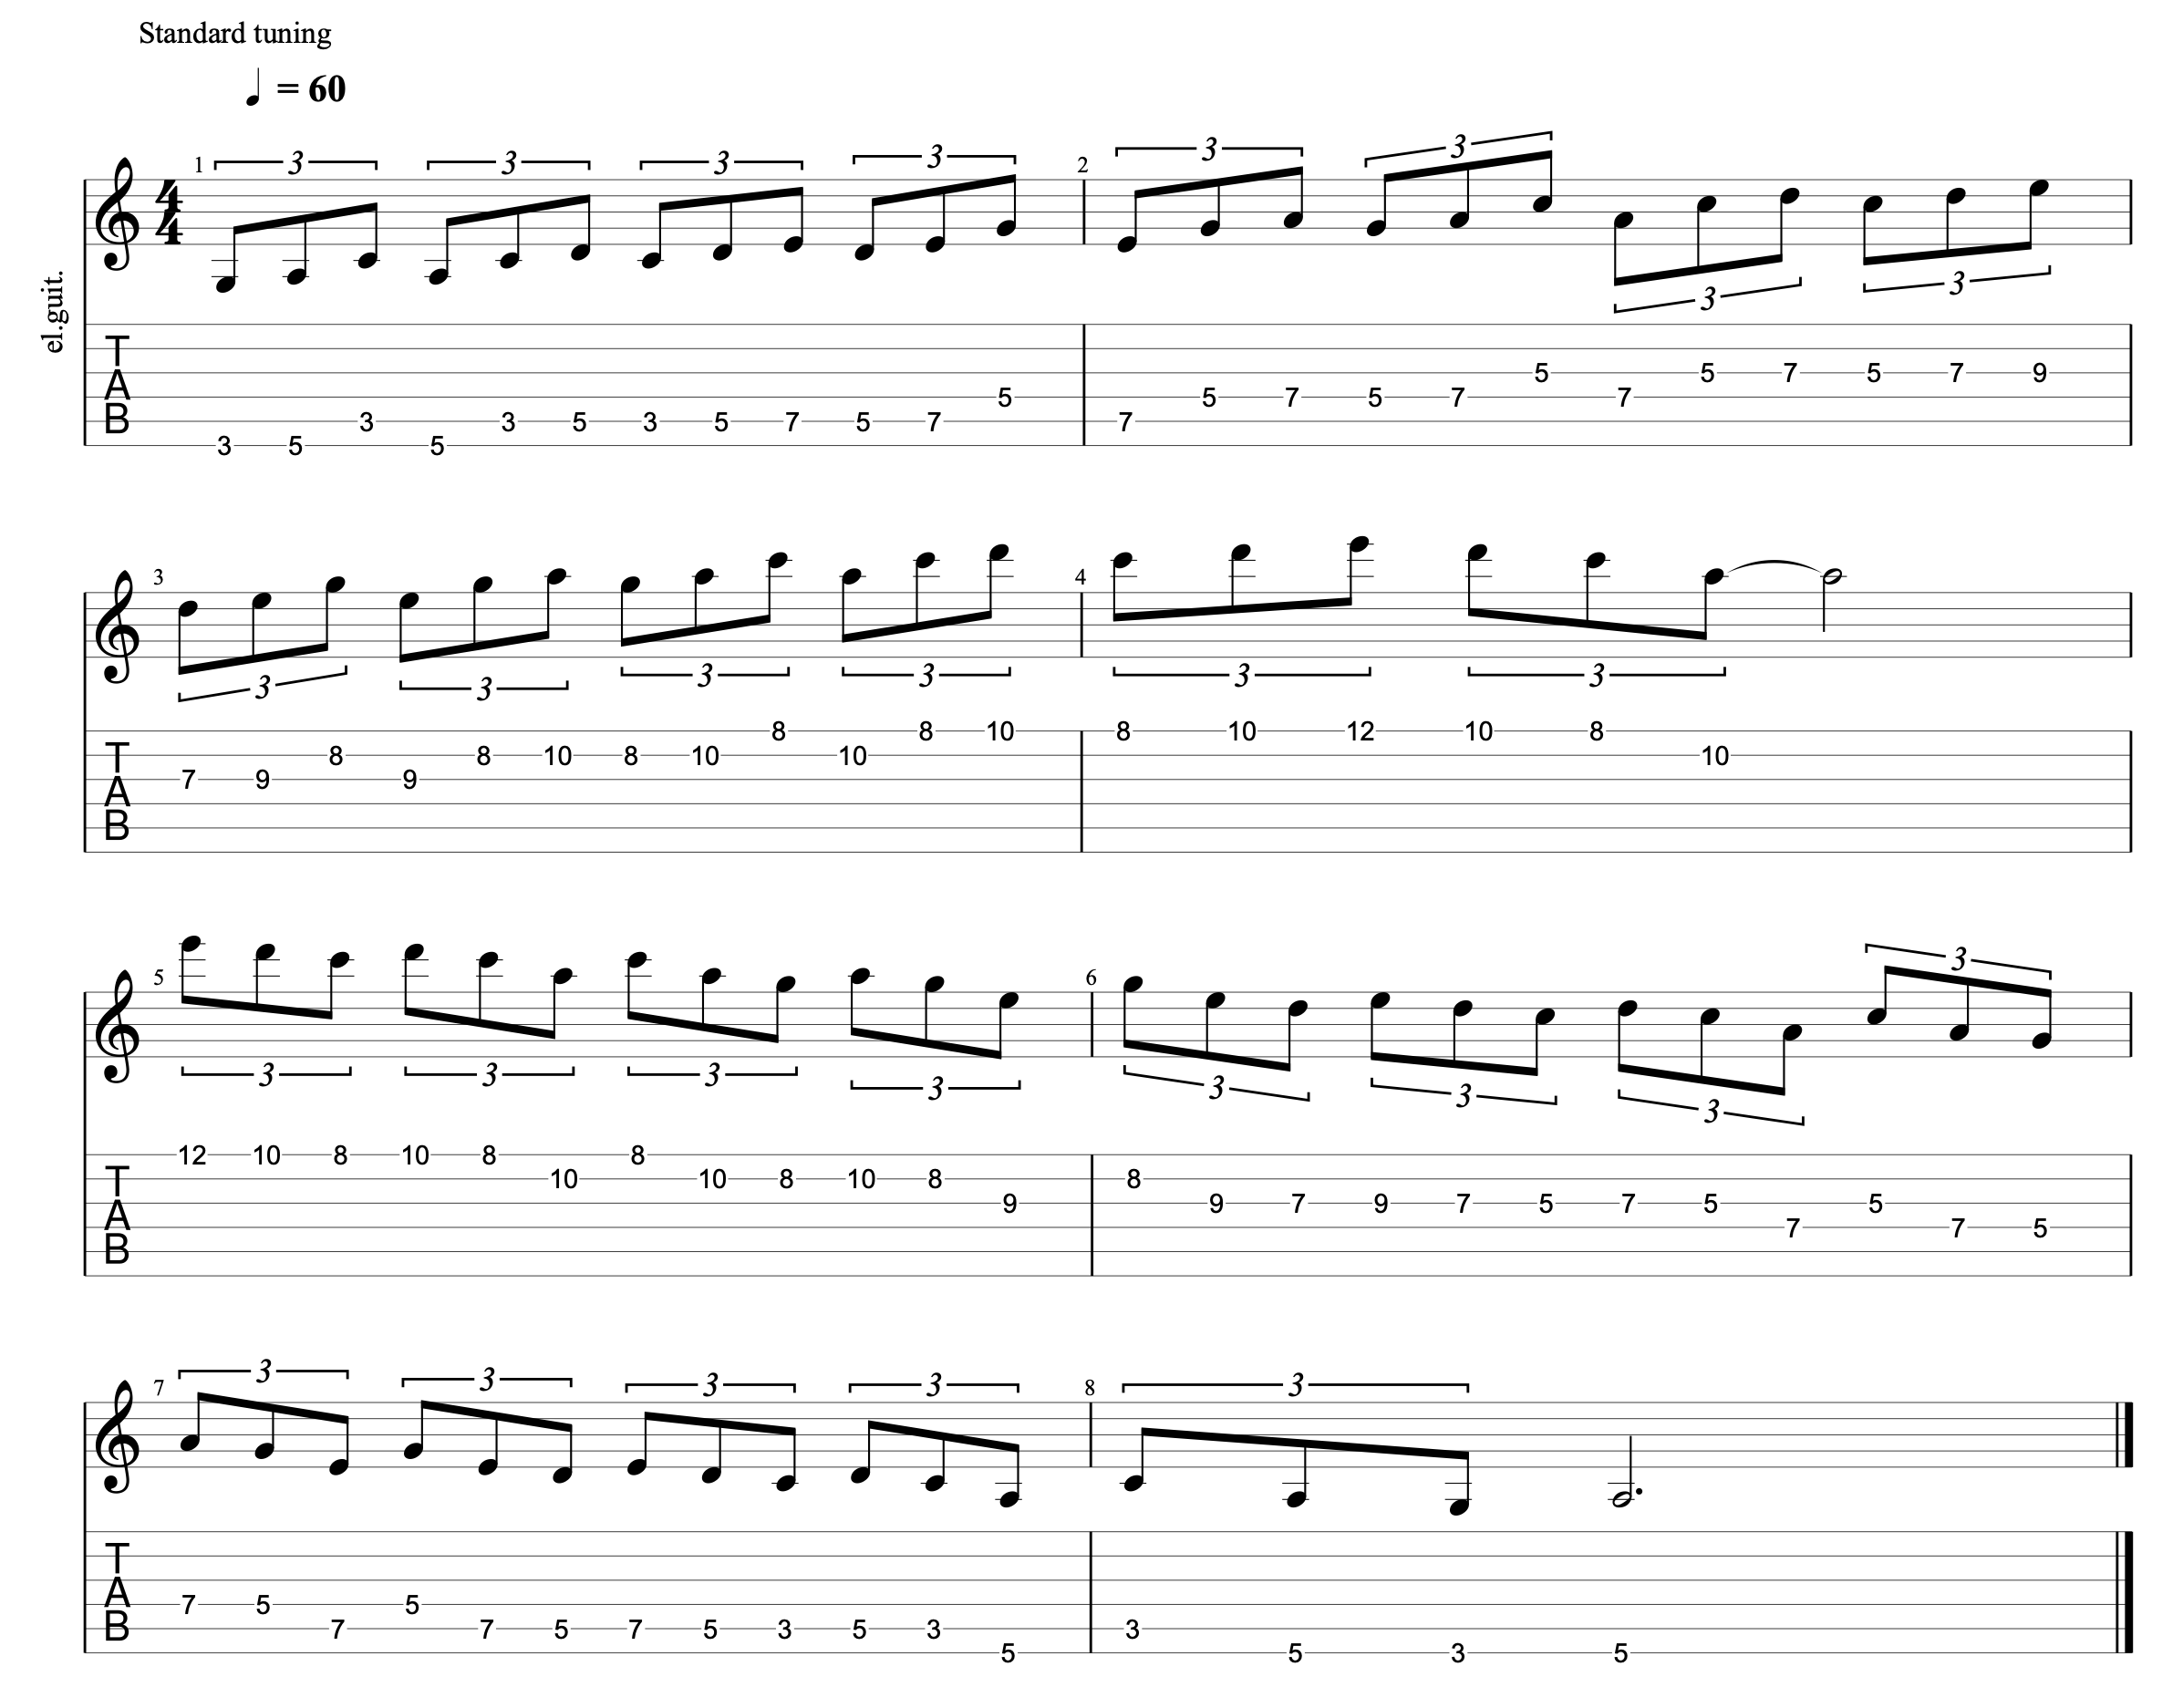
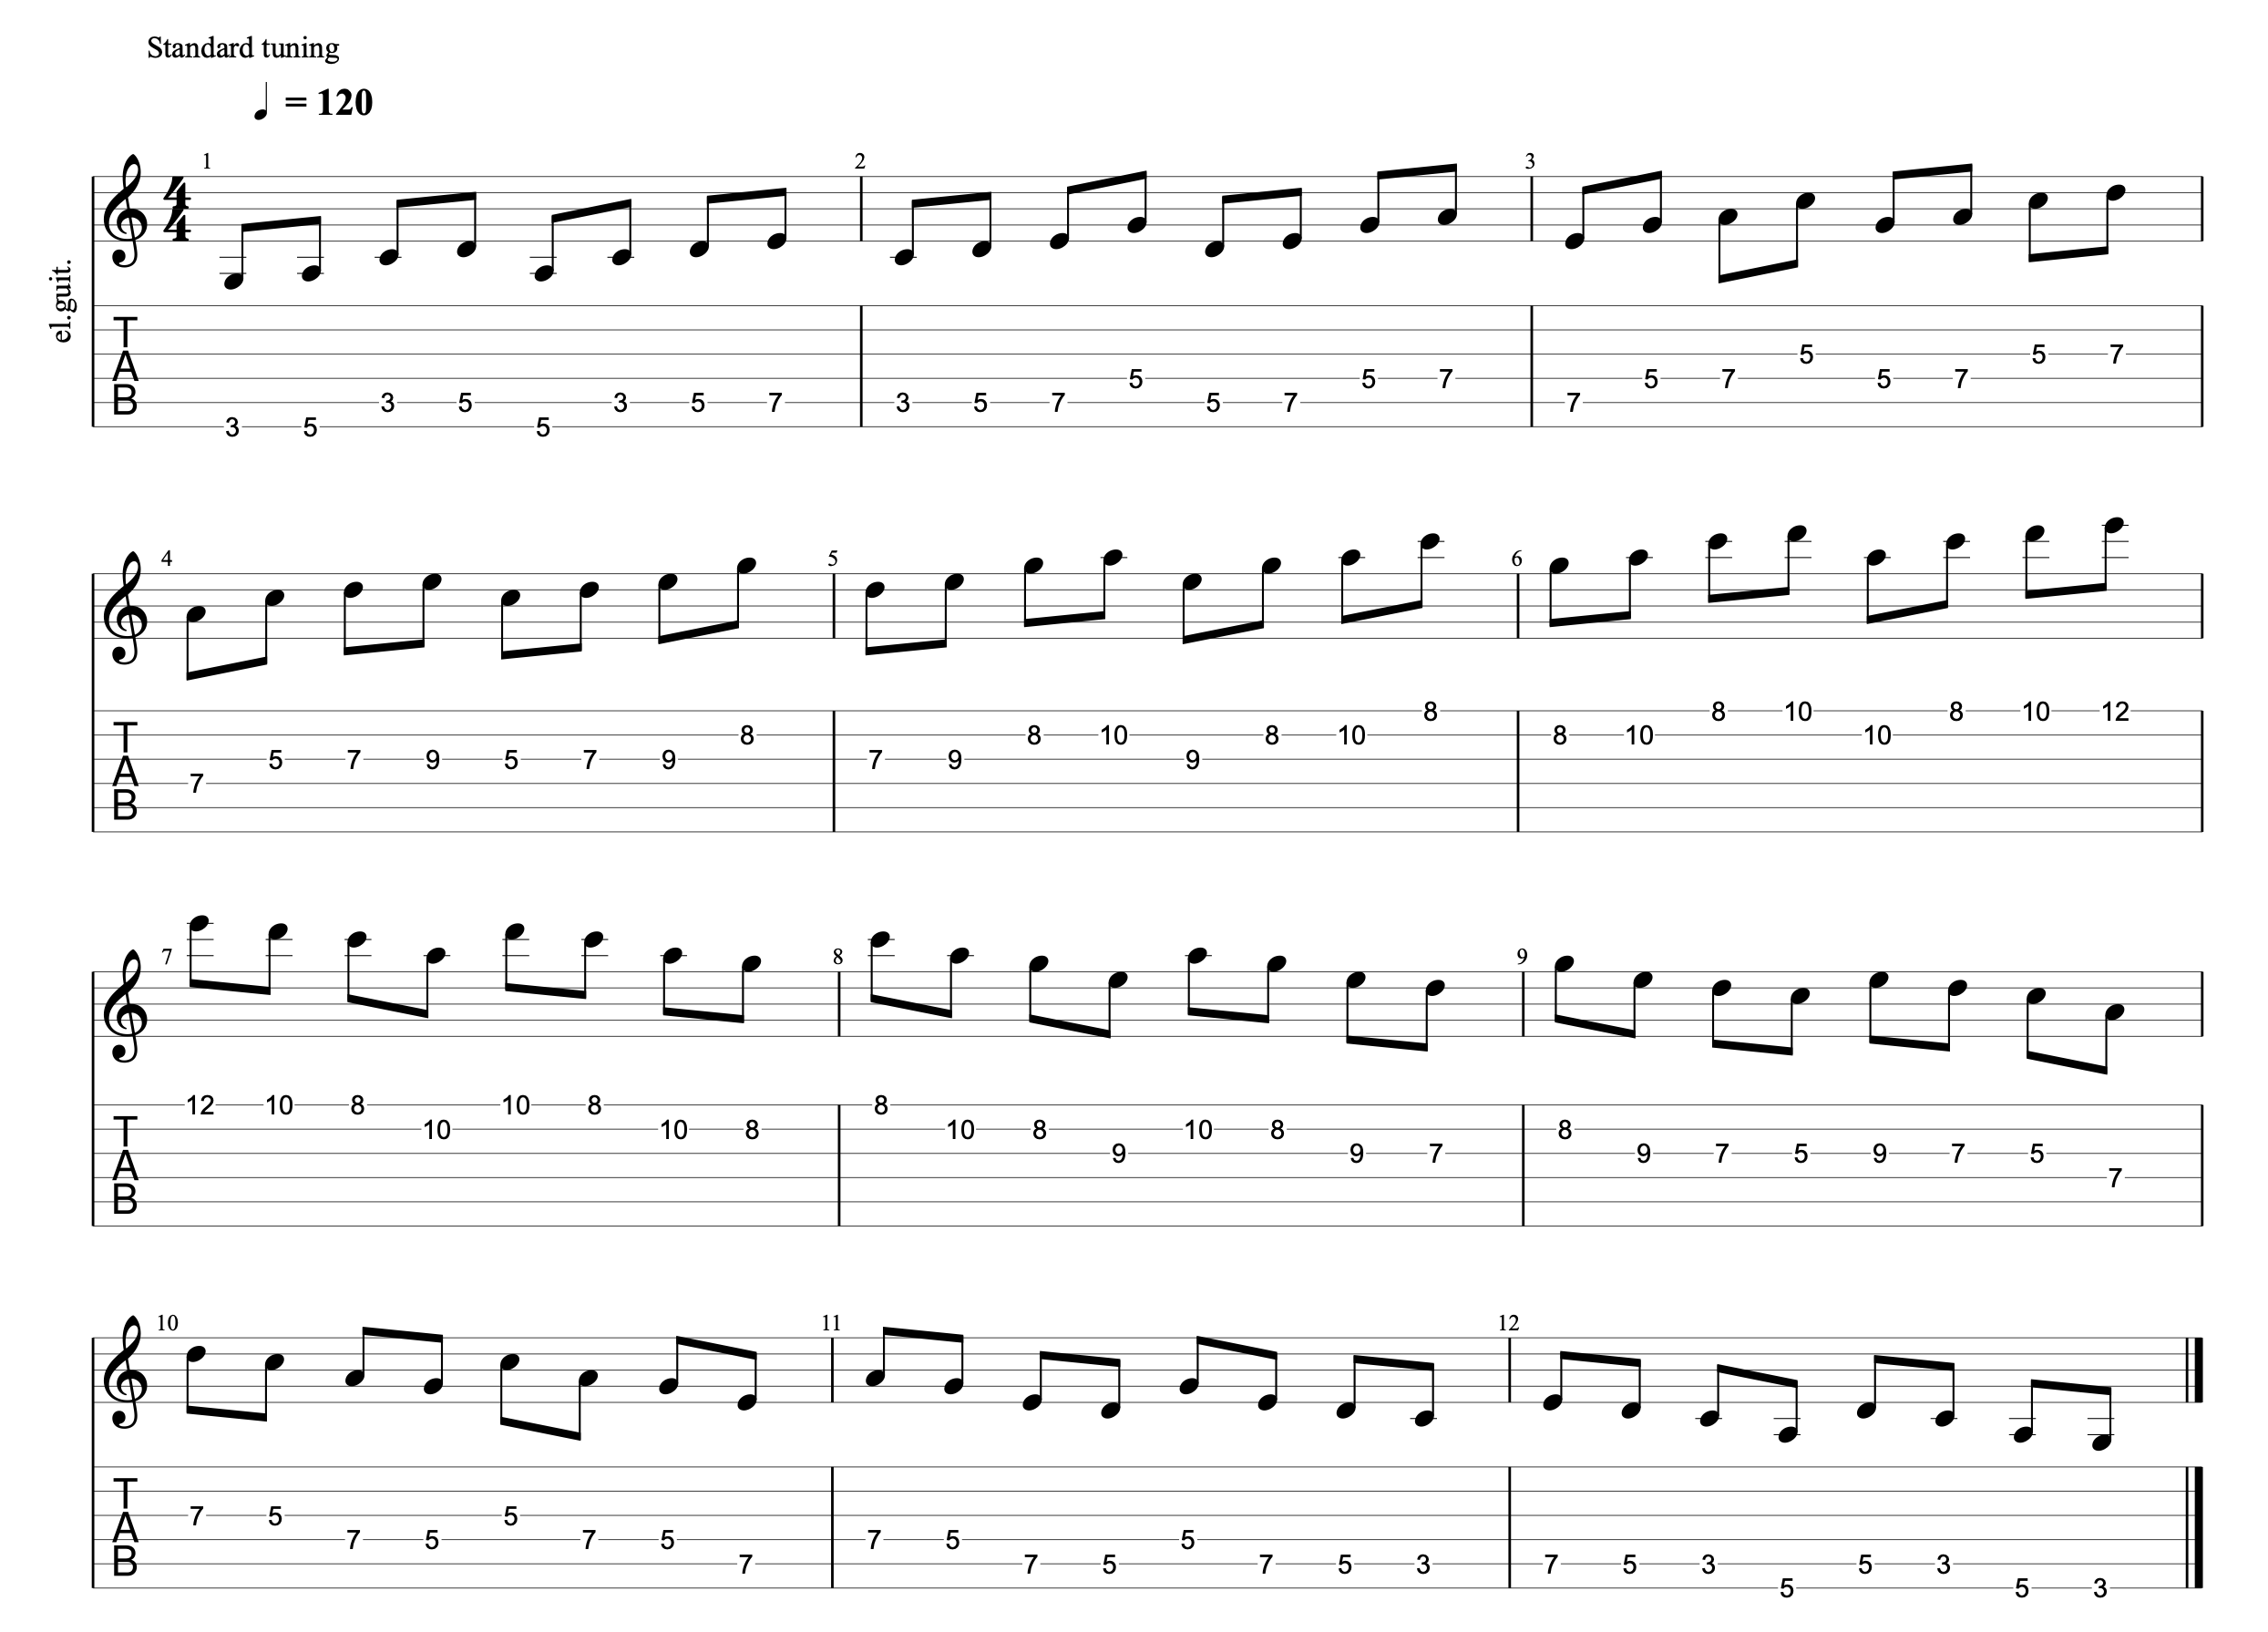
First try it ascending:
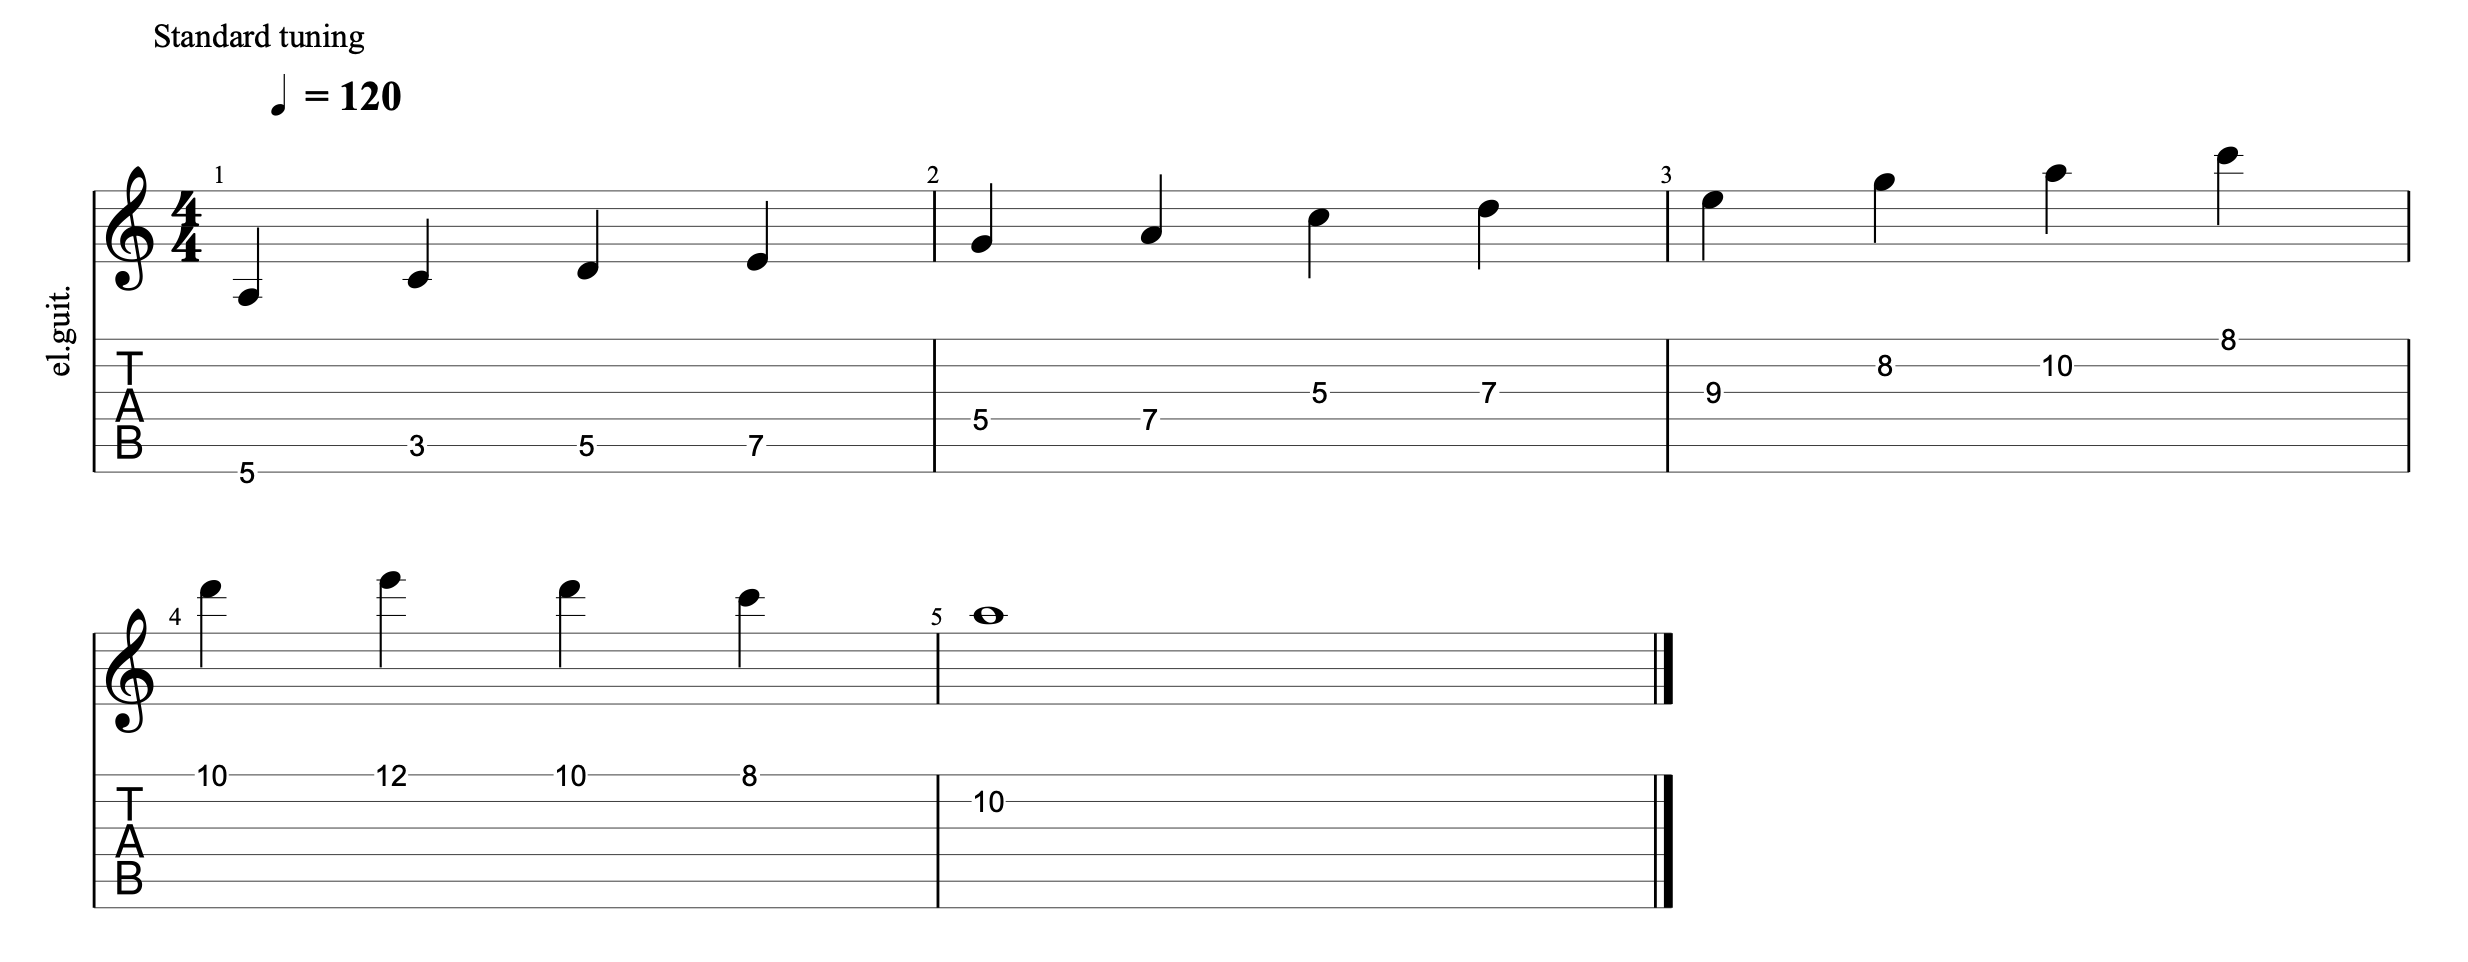
As you get comfortable connecting these three shapes, try sliding your third finger up the handle of each frying pan. That is, slide your ring finger from each p4 (D) to the p5 (E) at the end of the handle — your index finger will automatically be in the right place to play the b7 on the next string. This is a legato technique that’s used by thousands of great guitarists to move quickly between these three shapes in a fluid way. As you become used to it, you can start to make some extremely quick runs this way.
Next try bending the p4 to the p5 instead of sliding.
Say the note names aloud as you play them. Also try saying the scale degrees (root, b3, etc.) instead of the note names. The goal is to be able to find and recognize note names and scale degrees as easily as you can find and recognize your friends (that’s “Robert” who we also call “Bob”).
Now descending:
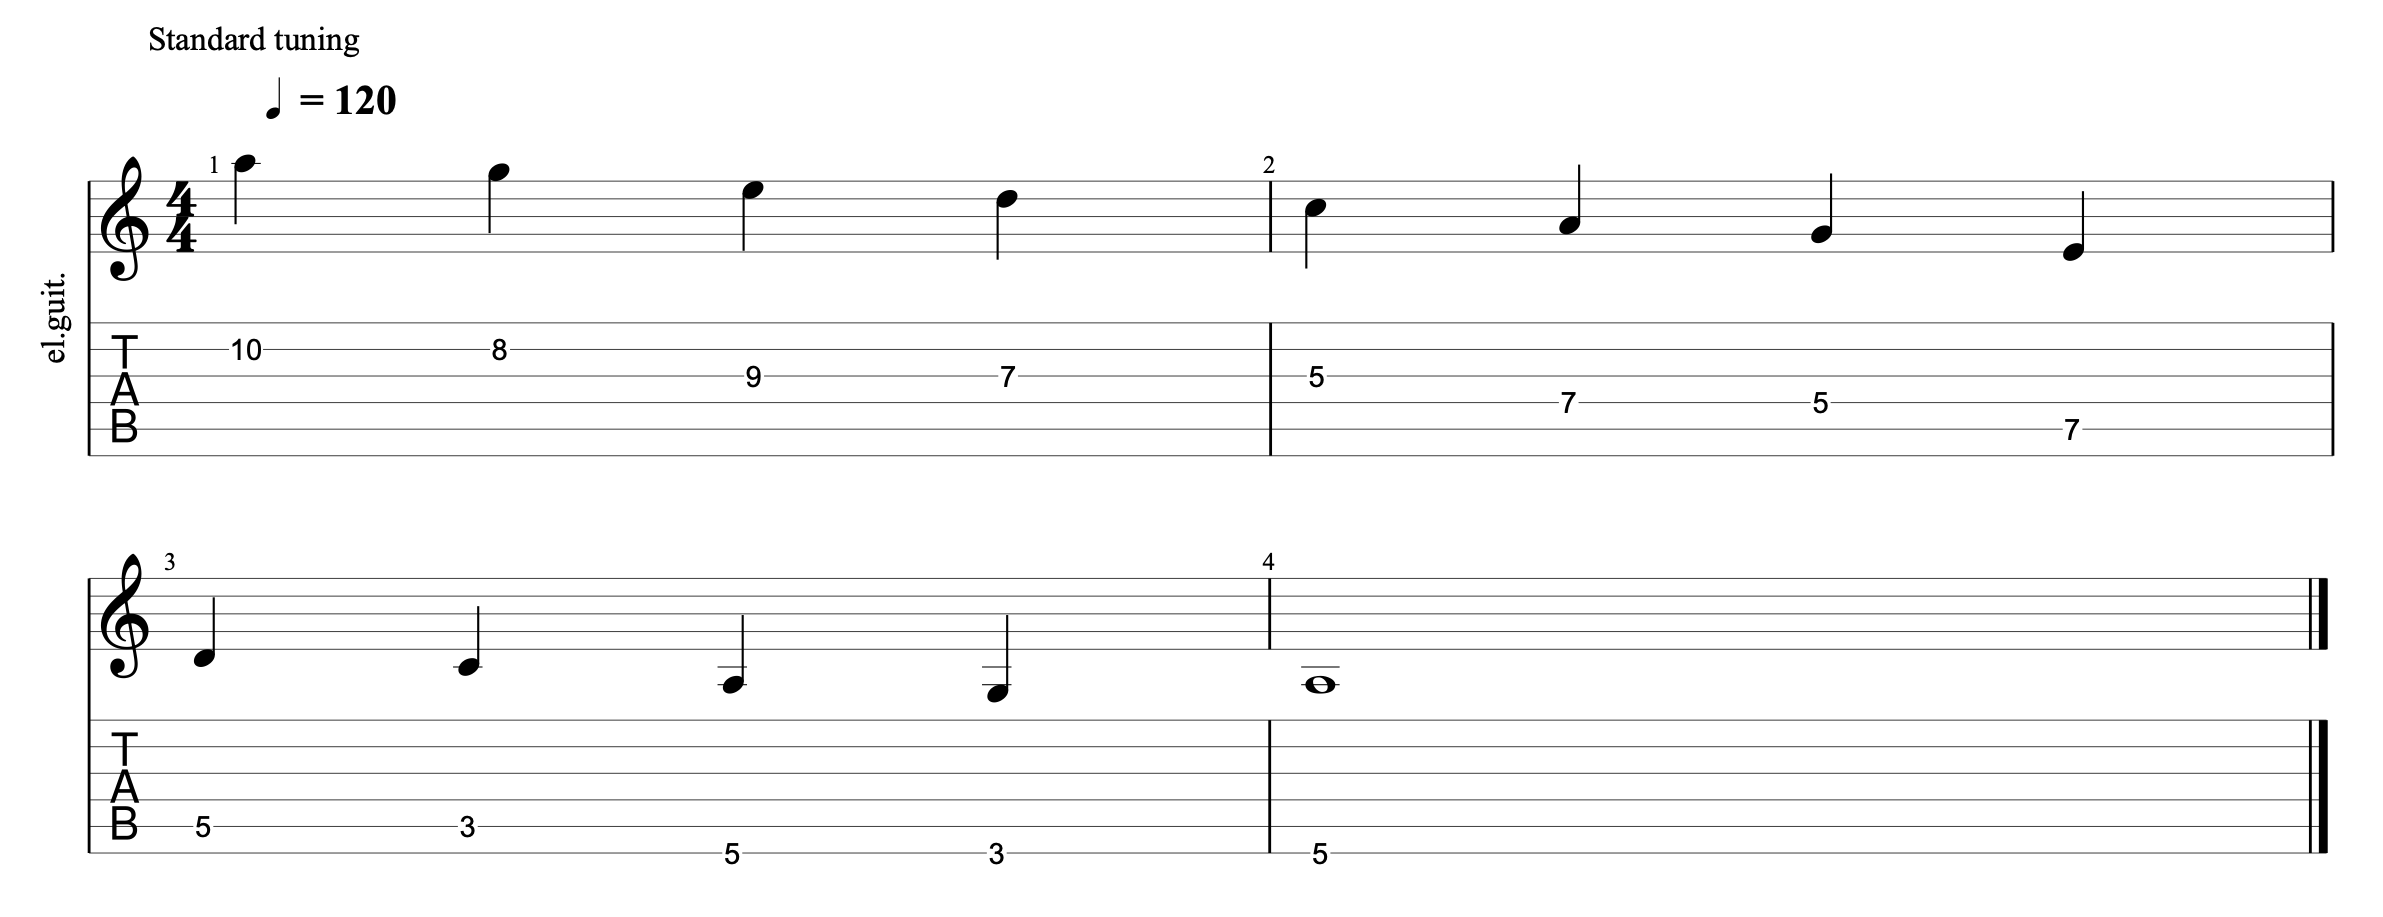
This time, try sliding down from p4 to b3 with your index finger in each shape. You can also “pre-bend” the p4 to play a p5, then relax the bend to play the p4. (Try bends and slides with any of the notes, not just the p4/p5.)
Continue just playing these two exercises back to back, just going straight up and straight down all three shapes. First play rubato (out of time) until you’re comfortable, then practice with a metronome, gradually increasing tempo.
When you feel pretty comfortable, but on some accompaniment in Am and practice soloing using all three shapes, creating ascending and descending lines, but anticipating the sound of every note you’re about to play.
If you go back and look at the “Two more pans” diagram, you’ll see that we are using most of the notes from the old “box 1” shape, plus a few more, but you should now find it easy to keep track of what note you’re currently playing or about to play. You’re soloing with a 15 note shape versus the 12 in the “box 1” shape, yet you should be soloing with intent rather than just random notes. It should sound a whole lot better!
Just as before, it’s good to practice this “merged” scale shape using the patterns we looked at previously. This will break you out of just playing notes straight up and down and help you to play a bit more melodically.
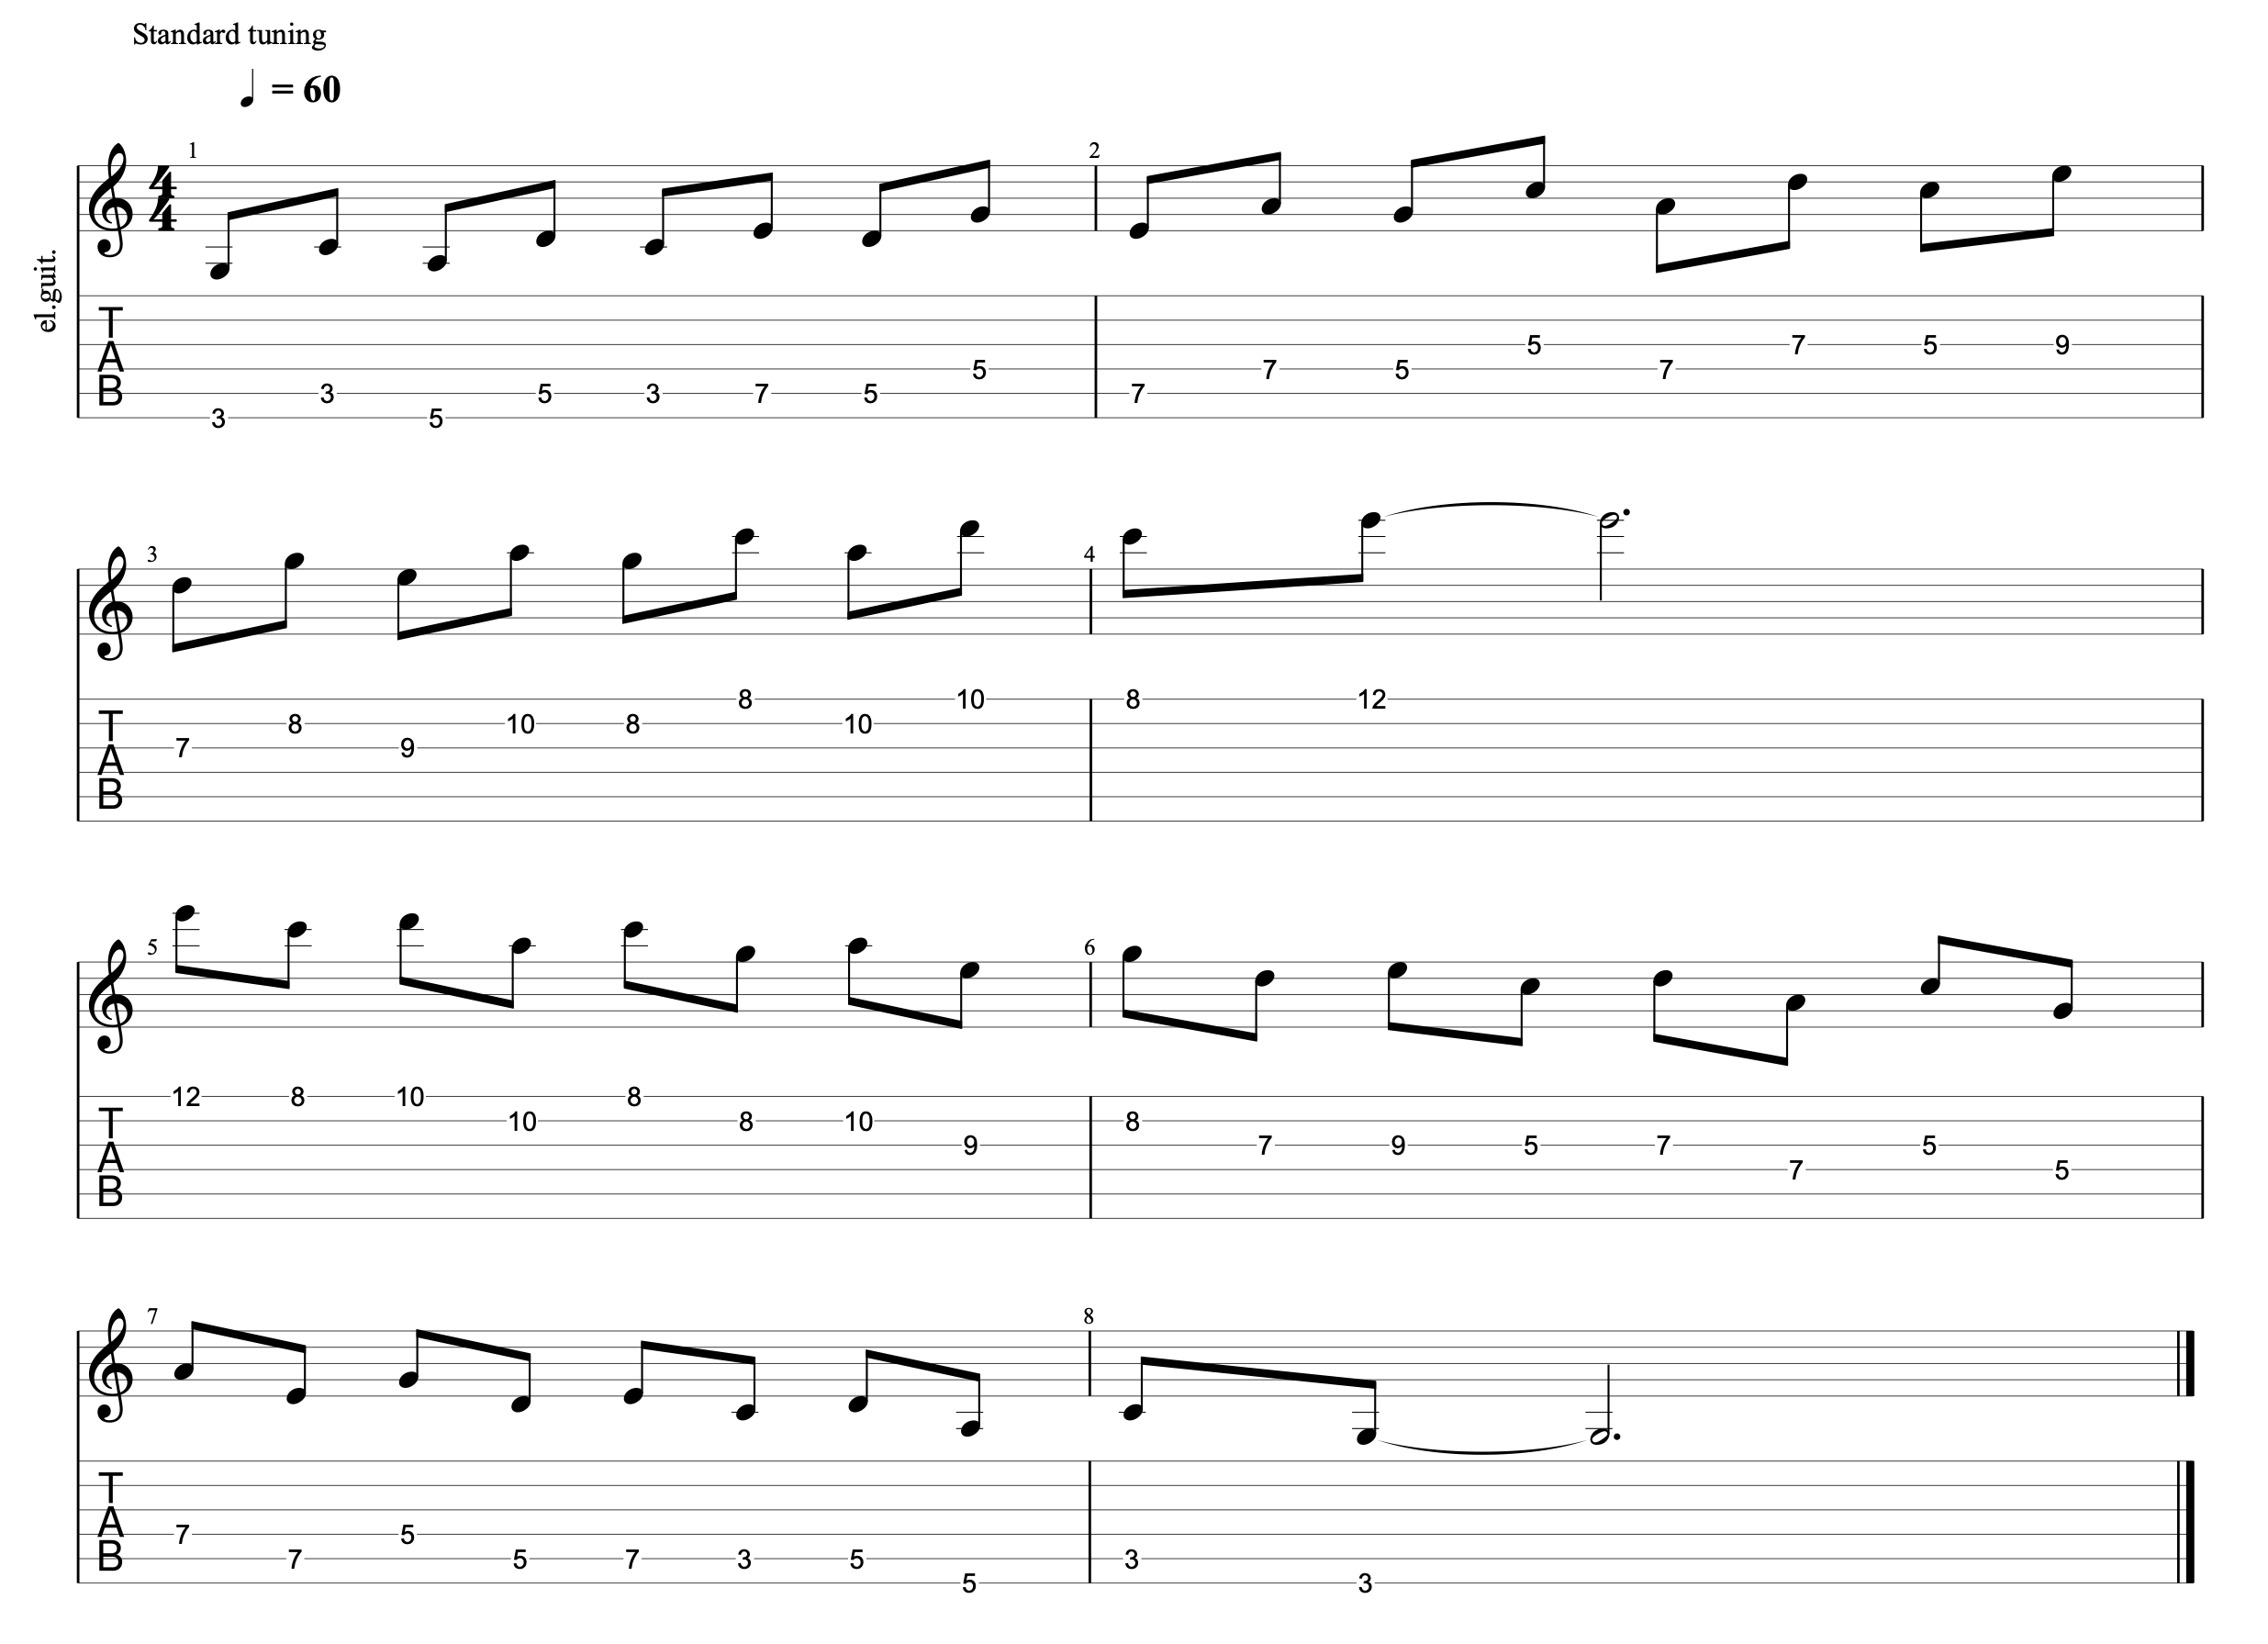
First try sequences of three notes:
With these patterns, it’s not strictly necessary to always start and end on root notes, but you may find yourself wanting to anyway, because it sounds better! It sounds more like a complete musical thought or expression when you end on a root note. The frying pan shape makes it easy to navigate back down or up to the closest root note (or any other note in the scale that you want to target).
Doesn’t that sound more interesting and “bluesy” than just going straight up and down the scale?
Next practice in sequences of four notes, exactly as we discussed with the original single-octave “frying pan” shape.
Practicing in “thirds” (every other note in the scale) as described previously is also a good way to get the shape under your fingers. It’s a nit, but because this is a pentatonic scale and some of the notes are more than a whole-step apart, some of these intervals aren’t diatonic thirds. Don’t worry about it for now, it’s still good to practice scales this way. It helps you to remember the note locations and equally importantly, it helps you hear and play intervalic melodies that are more interesting than just linear progressions up and down the scale.