When soloing or playing with a band, it’s often helpful to avoid the lowest two strings. Those lower registers are where the bass player and the rest of the band (or at least the left hand of the keyboardist) tend to hang out.
The blues uses dominant seventh chords (with extensions and alterations) almost exclusively. Just as with triads, it’s useful to spend a lot of time with seventh chords that only use the top four strings.
Seventh chords, four-note chords, can be inverted exactly like triads. Because there are four unique notes in a seventh chord, however, you end up with four inversions, not just three like you do with triads.
Example: C7 (root inversion)
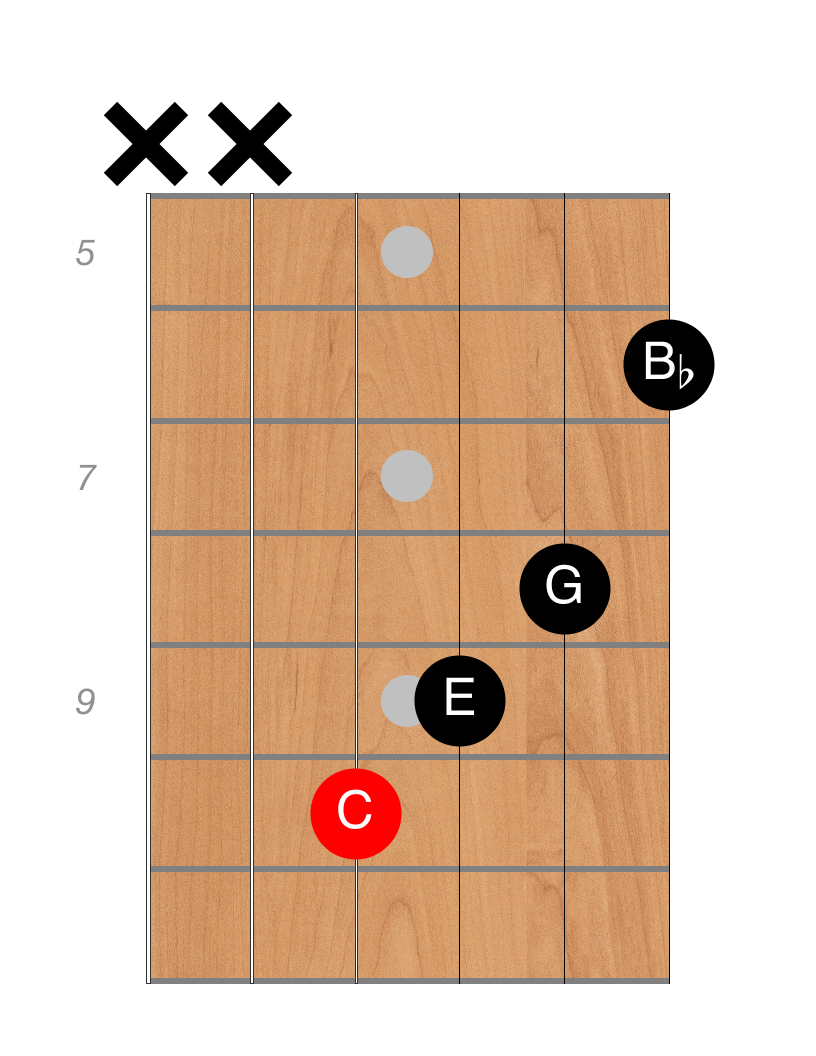
C7, for example, is spelled C, E, G, B♭. Playing those notes in order on the top four strings would look like this:
That’s a pretty big stretch, though, and hard to actually play in practice. So let’s re-order the higher notes to make it easier to finger. Instead of playing Root, 3rd, 5th, ♭7th, we will reorder it and play Root, 5th, ♭7th, 3rd:
You should find that much easier to play.
This still has the root note, C, as the lowest note, so we’ll still call it the “root inversion” even though the remaining notes aren’t played in order. Any shape with C in the bass is still called a “root inversion” of C7.
Remaining inversions of C7
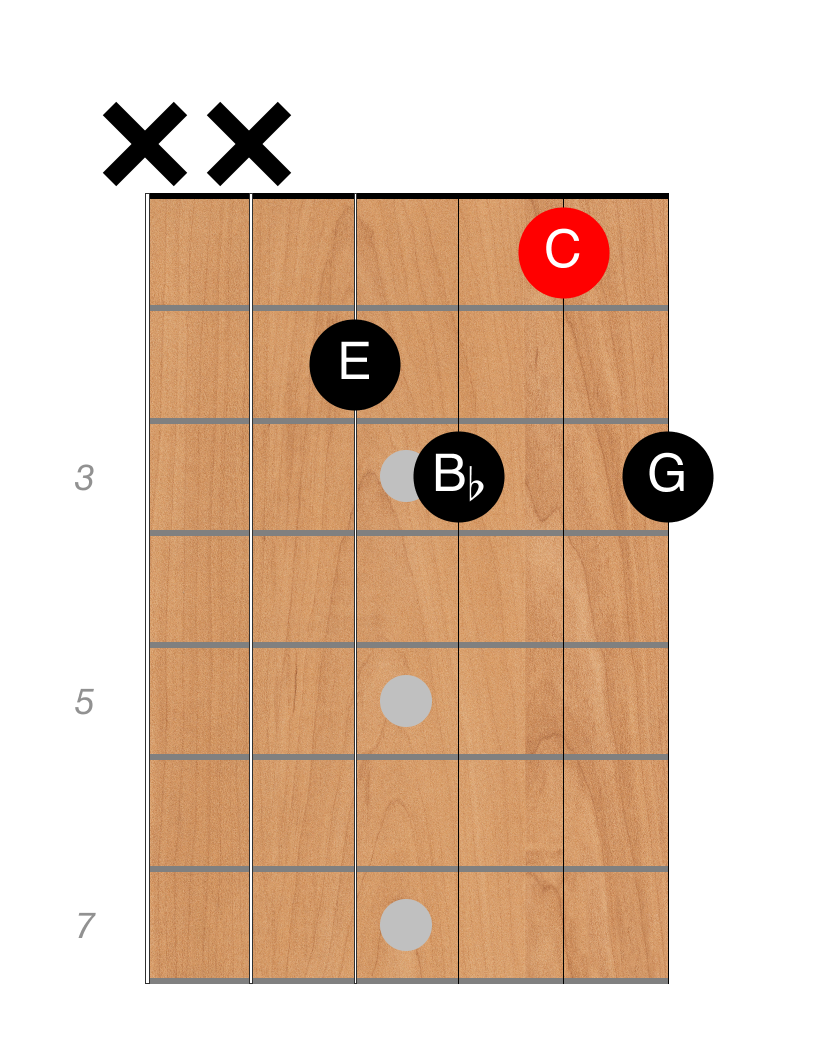
To find the next inversion, we raise each note to the next one in the chord. The root is raised to the 3rd, the 3rd to the 5th, and the 5th to the ♭7. Using note names: instead of C/G/B♭/E, we play E/B♭/C/G:
Let’s move that down an octave onto lower frets so we can continue:
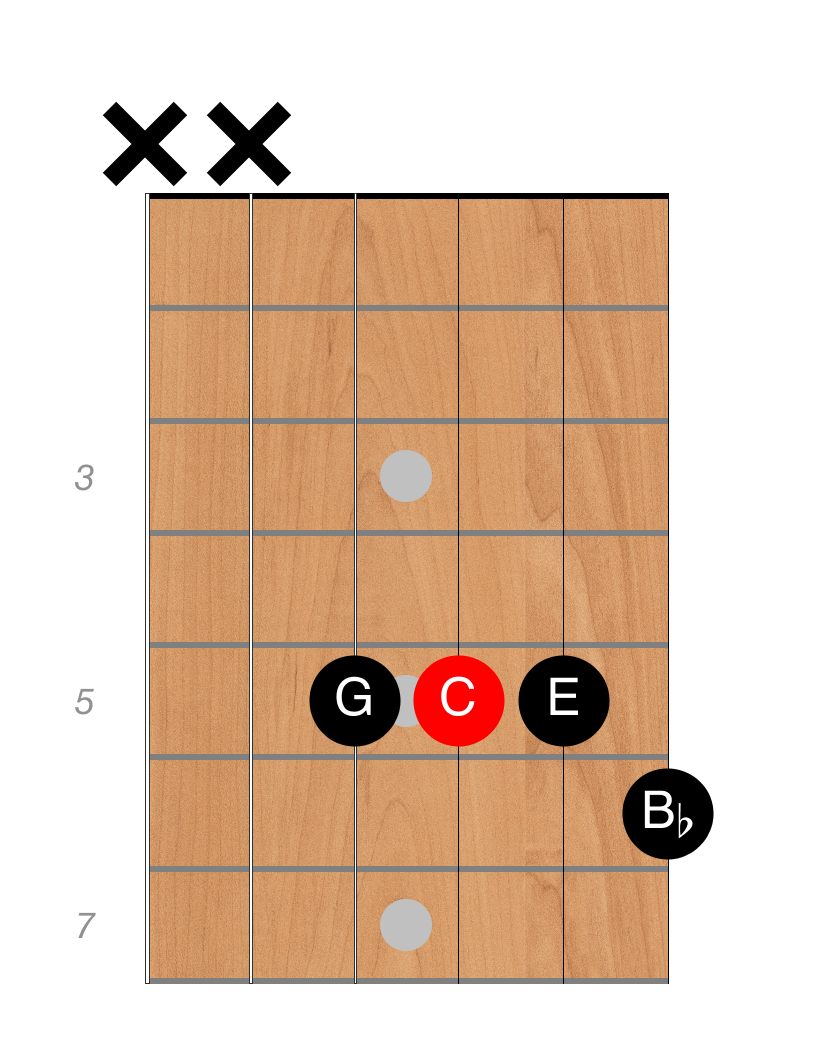
Now repeat the process of raising each note successively to find the second inversion:
And again to find the 3rd inversion:
Using these shapes
Now it’s worth knowing how we found all four of those inversions, but, in practice, most normal people just memorize the four shapes. It’s good practice (and mentally challenging) to try raising each note individually in order like this, but when actually playing music you’ll need to have the shapes already memorized in order to play fluidly and in time.
This “raise each note” trick to find inversions works with any chord shape, by the way, with any number of notes. If you are looking to find new chord shapes to play over a familiar tune, take a chord you already know and raise each note up to the next note in the chord. Voilà — a new voicing of the same chord. Try it!
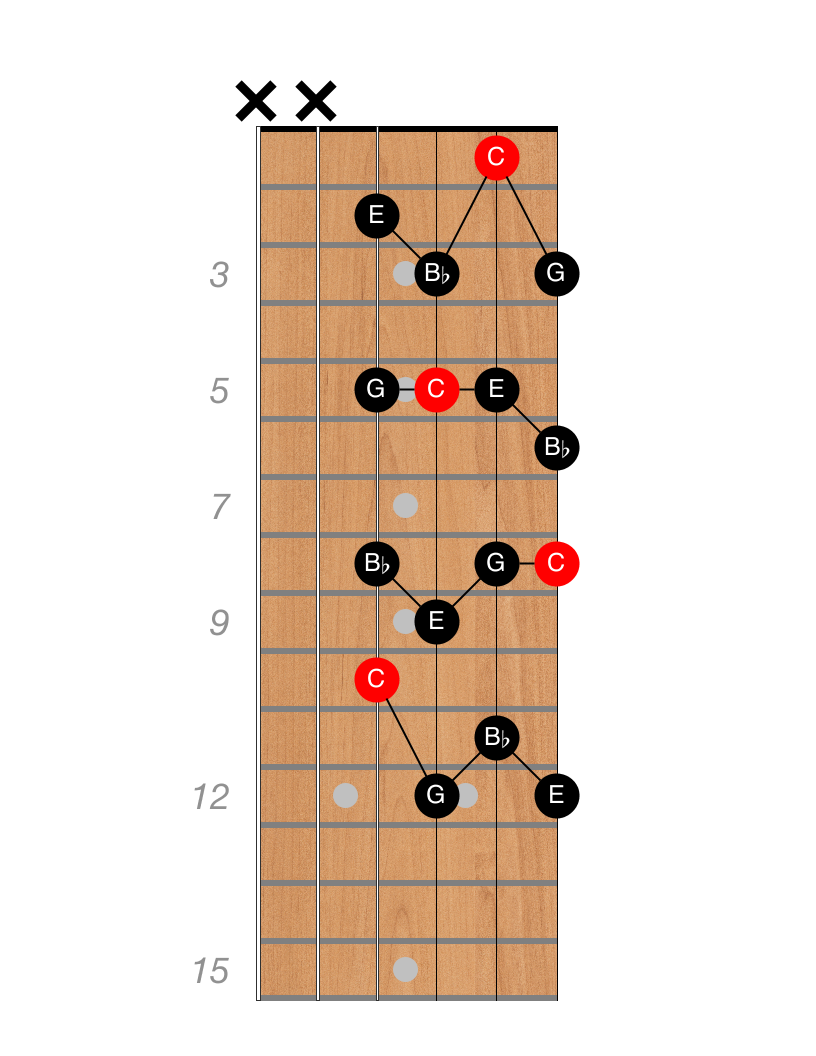
Let’s get back to the blues and dominant seventh chords, though. Here are all four inversions shown on the complete fretboard:
Practice playing all four shapes of C7 until you’ve got the shapes and locations memorized.
Notice that the root note only exists in one location within each inversion (of course, since we’re only playing 4-note shapes). That is, one shape has the root on the first string, another on the second string, another on the third, and the last one on the fourth.
Since you’ve already memorized the notes everywhere on the fretboard (right?!! :-) it should now be easy to find dominant 7 chord shapes for any chord anywhere on the fretboard!
Finding dom7 chord shapes
Let’s say your fretting hand is somewhere around the 5th fret and you want to play a G7 chord. You KNOW the note at the 5th fret of the D string is a G, so you should be able to quickly find this G7 chord right under your fingers:
Practice drill
The first step is simply to practice forming all four shapes. First practice forming and moving between all four shapes rubato (out of time). Play the chord, then just hit the root note. Keep moving between all four shapes.
Start with C7 as diagramed above, then practice in every natural key by ascending in 4ths. After you get comfortable moving between all the C7s, find all four F7s, then all four B7s, then E7, A7, D7, and finally G7.
This will be hard at first, but it gets easier. You’ll quickly discover two ways to find the chords:
-
Pilotage: First find the root on one of the top four strings, then form the appropriate chord shape around that note. (This is what was described above with the G7 example.)
-
Dead Reckoning: Starting with a shape you know, form the next shape higher or lower on the fretboard. The shapes always proceed in the same order. If you can find one, you can find the rest.
Here’s a video of me demonstrating how to practice these shapes. Keep working at it until you can quickly form all four shapes of dom7 on the top strings, progressing through all natural notes (BEADGCF).
You’ll quickly and automatically become proficient with both pilotage and dead reckoning if you keep at it. There is no need to force yourself to think both ways, it should happen naturally.
In the next post, I’ll show how to apply these shapes to “comp” (accompany) the blues.


